Windows 10 users who experience issues such as slow response time may look into their Task Manager for guidance. Task Manager provides you with a wealth of information regarding the processes that are currently running on your machine.
Bạn đang xem: 100% disk usage on windows 10
Way 4: kiểm tra For Malware
Your computer may be infected with malware that is causing your disk usage khổng lồ spike. If you have antivirus software running in the background it should have caught the issue. Nothing is perfect though, so force your antivirus package to scan your hard drive for a potential infection. This could be a time-consuming process since your disk is already experiencing high usage but might be necessary lớn identify & remove malicious software.
Way 5: Stop the Superfetch Service
Another Windows 10 feature that can cause problems is the Windows Superfetch service. You can disable this service temporarily in a similar fashion lớn Windows search with the command: net.exe stop superfetch.
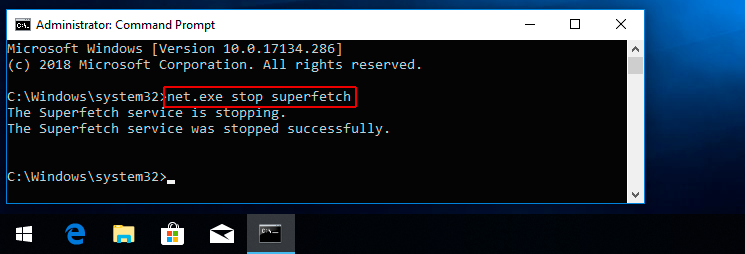
To disable the service permanently, use the same procedure as for disabling Windows search.
Way 6: Change Energy Options from Balanced to lớn High Performance
This change of energy settings seems to lớn have worked for a number of users who have experienced 100% disk usage on Windows 10.
Use this procedure: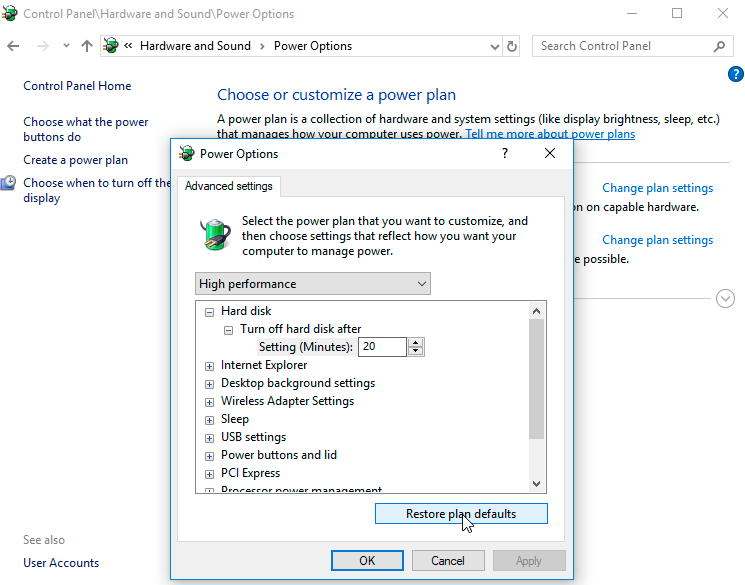
Way 7: Temporarily Turn Off Your Antivirus Software
Another step khổng lồ take when investigating the cause behind your Windows 10 100% disk usage problem is khổng lồ turn off your antivirus software temporarily. See if this improves your disk usage. If so, you may want to lớn consider changing antivirus packages. Even Windows Defender can cause problems by increasing I/O và network usage which might lead to high disk usage.
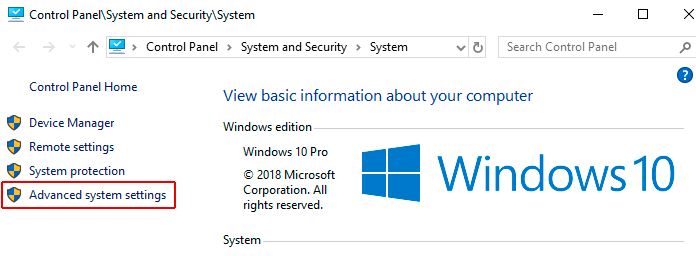
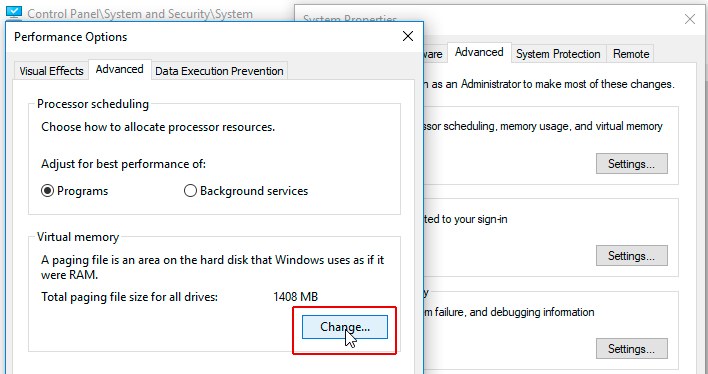
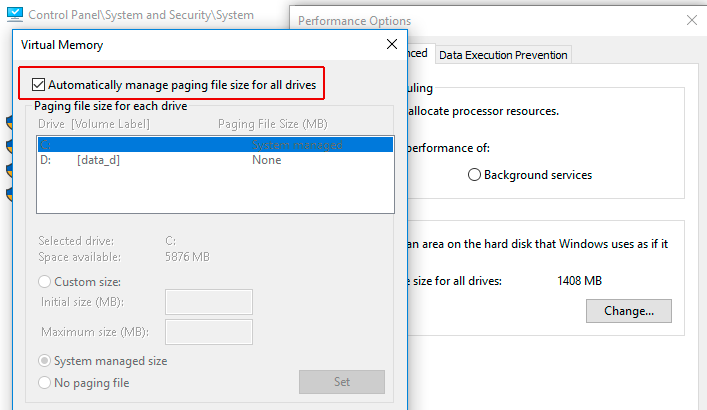
Way 8: Reset Virtual Memory in Windows 10
Virtual memory treats your disk as if it is RAM & uses it khổng lồ swap out temporary files when it runs out of actual RAM. Errors in the pagefile.sys can cause 100% disk usage on your Windows 10 machine. The remedy lớn this problem is khổng lồ reset your virtual memory settings.
Follow these steps to reset your virtual memory:
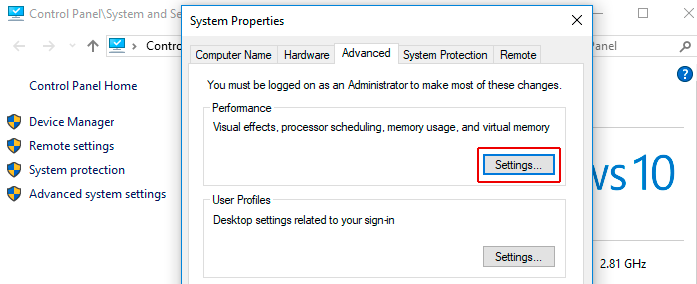
In your computer’s “System Properties” you need lớn click on “Advanced system settings”.

Way 9: Run check Disk
A check disk can show you if there are any physical problems with your hard drive. Usually, a high disk usage indicates that there is an application or logical issue driving the disk usage, but it is worth your time to rule out any physical damage. Run check disk and cảnh báo its results.
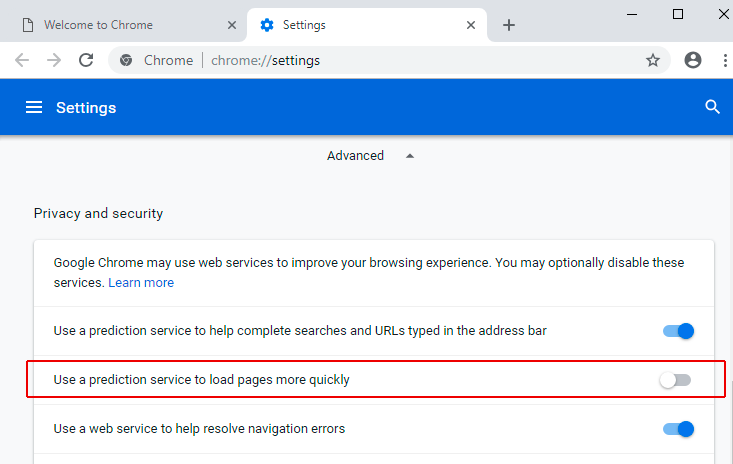
Way 10: Change Settings in Google Chrome & Skype
Some users have reported that making these changes lớn your Google Chrome & Skype settings can have a beneficial effect on your disk usage.
For Chrome, make this change:
To update your Skype settings use this procedure:
khổng lồ start Skype for Windows 10, select the Start thực đơn from the bottom left of your screen. In the các mục of available applications, scroll down lớn Skype for Windows 10 và click to xuất hiện it. Select the Security tab and click on the Edit option. In the danh mục of “Groups or Usernames” select “ALL APPLICATION PACKAGES”. Check the Write option khổng lồ select Allow which lets Skype write khổng lồ your disk. Press OK.


